This was posted 4 years 3 months 18 days ago, and might be an out-dated deal.

Related
  • expired

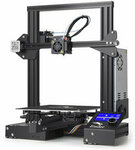
Creality Ender 3 3D Printer $268.43 Shipped or Pro $293 Shipped (Aus Warehouse) @ Banggood

1290
This post contains affiliate links. OzBargain might earn commissions when you click through and make purchases. Please see this page for more information.

Hi guys. Long time lurker, first time posting a deal.

With the crazy COVID19 pricing starting to rollback, the ever popular Ender 3 is on special at Banggood AUS warehouse for a great price of under $270 shipped or the Pro for under $293 shipped. Plenty of videos on this 3D printer for 3d printing newbies. I grabbed a Pro with the glass bed ($22) and a kg of filament ($35). Great bang for buck. Enjoy!
Referral Links

Referral: random (143)

Referee gets $2 in coupons. Referrer gets 10% off (if referee spends over US$10)

Related Stores

Banggood
Banggood

closed Comments

  • Never owned a 3D printer before, but have been keeping an eye out for a decent deal to dip my toe in.
    This seems to be the highest voted 3D printer deal in the past year - so pulled the trigger on the Pro model.

    Id like to get the glass bed, but now the AU warehouse is out of stock, it looks like 1-2 months from China (~$30 delivered).
    Its available for $47-49 from Amazon (AU stock) https://www.amazon.com.au/dp/B08154LNZK/

    Looking at some other upgrades I could order locally so they arrive around the same time as the printer:

    Leoway Aluminium Extruder Upgrade Kit - $17
    https://www.amazon.com.au/dp/B07PGDWZHS

    Leoway Aluminium Extruder - 4 Leveling Springs - 2 Silicone cases - PTEG tube - $34
    https://www.amazon.com.au/dp/B07VD8PVRH

    One of the comments for the kit above says

    "the only real upgrade achieved with the kit is the metal extruder. For my Ender 3 Pro there is no improvement through the included other accessories as they only replace like for like"

    Does that sound right ? Trying to decide if its worth buying the more expensive of the 2 kits.

    Adding BI Touch for auto leveling sounds like one of the most useful upgrades.. any suggested local source ?

    • +5

      This is based on my opinion as others might be different as it's differs depending on each users usage and what they want to achieve and how far they want to go with their their 3D printer.

      Glass plate is great but the magnetic plate that comes with the Ender 3 Pro works just perfectly fine if you're working with PLA and PETG.
      I've got a glass bed that I've used kapton tape on it because it gives me great adhesion and I like the buttery smooth first layer without needing any hairspray or glue stick. Just need to clean the bed is isopropyl alcohol. Prior to changing, i didn't have any issues with adhesion as long as my bed was levelled correctly.

      There's a few different variant of the glass from creality but i recommend this one if you were to buy one.
      https://www.ebay.com.au/itm/323876621025

      It says from Aus stock but who really knows and delivery is about 1-2 weeks. There's a few sellers selling these. This one has the smaller logo at the bottom which means there's more microporous coating(the black coating that helps with adhesion and easy removal of print when cooled) in the main area you're printing.

      As for the metal extruder, it won't be needed immediately but good to have as the plastic one that comes with the printer will eventually crack and you'll have issues with printing. For the Ender 3 I recommend the Dual gear rather than the single one with the pulley like you've linked.
      Either one is fine to be honest. I wouldn't recommend doing this before you familiarise yourself with the printer as you'll need to calibrate it. Without understanding your printer first, you might make it unusable before using it. Like I said, the plastic extruder will probably last you some time before it will fail, good to have it on hand but not something you need to do immediately.
      For my other printer I printed a Extruder from thingiverse with PLA+ and it's been working for over a year without any issues but going to Metal extruder would be the end goal knowing that you have eliminated a possible element/part that could cause issues from wear and tear.

      https://www.ebay.com.au/itm/203010913404
      (can be source from oversea for much cheaper)

      4 Uxcell springs (20mm x 8mm) is what you would need for the ender 3/pro. Amazon had a listing of 10 for $10 but checking it now, it's no longer available.
      https://www.amazon.com.au/dp/B08D876H6R
      I'm sure there's other listing on ebay (Aus stock) or amazon AU.

      Silicone case won't be necessarily as I think the ender 3 pro comes with one already installed. Need to check mine. You would only need a new one if you were to upgrade to a new hotend (E3D V6 or microswiss hotend).

      PETG tube - Blue tube (aka Capricorn tube) is highly recommended if you're planning to print with flexible filament like TPU, otherwise the stock will work without changing but the capricorn tube is a better quality tube.
      https://www.amazon.com.au/dp/B085VGC1VC/ref=cm_sw_em_r_mt_dp…
      (cheaper again sourcing from oversea. Either direct creality but coming from china or aliexpress creality store for about ~$16USD)

      BL Touch - it's good to have but not necessary. If you were to get the Yellow Springs, you won't have the need to re-level the bed every few prints or so.
      If you want to go down this path then flashing your current firmware to Marlin is the first step or upgrade to a BTT E3 Mini board for easy installation.
      The only place I found locally is here but pretty pricey:
      https://technologyhub.com.au/product/anyclabs-bltouch-creali…
      (sourcing from oversea if about ~$70.) Also don't get a 3D touch (clone) which causes more issues than it's worth.

      BTT E3 Mainbroard - Real main advantage would be the quiet stepper motors. Once installed you'll only be hearing the fan. About ~$50 but source from oversea.

      Nozzles - Good to get some spare nozzles. 0.4 if you're just doing normal every prints. 0.2 if you're planning to print miniatures with better detaililng.
      Brass nozzles is cheap so grab a few of them. Harden Steel nozzle is better if you're planning to print with carbon fibre or glow in the dark, it'll eat into the brass nozzle and you'll have to replace them but given how cheap they are and I don't print in glow in the dark all the time, it's fine if i need to change them.
      Get other sizes too if you want to compare the quality and speed of printing of each since brass nozzles is cheap about ~$1 each.

      I think I've covered most things that someone starting out 'may' need later on.
      As I said earlier, your printing will print fine without all those upgrades for some time before needing them. It's best to familiarise yourself with the printer first and determine what you need and how much you want to achieve. You will soon learn you might not need do upgrade anything at all, or fall in my trap and just start doing everything because it's a fun and an interesting hobby.

      Hope this has helped you and others.

      • Unable to edit but it's PTFE tube* not PETG tube

      • Thanks for all the info

        • Awesome post… Thanks for the thoughts and detail. Very helpful.

  • +1

    So there were some speculation and rumours about some Ender 3 Pro with the newer board installed from the Ender 3 V2.
    Instead of the green board V1.1.4 some were getting the newer black board V4.2.2 from the Ender 3 V2.
    Some were saying that it was a mistake from the manufacturer but some said Creality will start sending out the newer board in Ender 3 and Ender 3 Pro with future shipment batch.

    My mate and I both bought the Pro and I was gambling on hoping to get the newer board. Confirmed my mate got the newer board and so did I.
    Removing the 3 screws from the bottom and 1 on top to remove the cover to the main board.
    This is a game changer because the newer board has the TMC2208 stepper motor that makes the machine 'silent'. Same stepper motor that comes in the V1.1.5 Silent board and same one that comes in the BTT E3 mini board. Also it's 32Bits with boot loader already installed so flashing the firmware is as easy as inserting the firmware on a microsd instead of using a Arduino to install the boot loader to flash firmwares.

    This is what the new board looks like:
    https://imgur.com/gallery/cLi0qrV

    • Sorry all, looks like there's a high chance that it has the same revision board as the Ender 3 V2 but the creality may have swapped over the drivers to a HR4988 (which isn't silent) instead of the TMC2208(silent). When you print you should be able to tell which drivers you got.
      Only real benefit would of this board is 32bit with the bootloader instead of the 8bit board.

      • +1

        https://www.creality.com/blog-detail/ender-3-motherboard-cha…

        Looks like Creality has posted this 1-2days ago.

      • How silly to include the 32bit controller board but use an inferior driver. Can you upgrade the driver by flashing a different firmware?

        • +1

          No that won't be possible. The stepper motors will still be 4988 even if you attempt to flash to another firmware.
          There was issues with the early release of Marlin with this board where it was picking up TMC2208 and was causing people issue when they have HR4988 drivers. Pretty sure that's all fixed now.
          Unfortunately these aren't plug-in drivers and are soldered to the board so it's rather difficult(not impossible) to replace.
          Not worth the time and effort tbh.

          • @iamtezr: So if you need the 32 bit board plus different stepper motors to get silent operation, why do some sellers advertise silent operation for a non-pro when selling just the upgraded controller board? Have you or your mate done a print to confirm non-silent motors in this batch?

            • @Hazza: you don't need a 32bit board for the silent operation. The stepper motors are what makes them quiet. You can have the quiet stepper motor in the 8bit board. The V1.1.5 is an 8bit board with the TMC2208(quiet stepper motor) but rather than going this option, people would pick the BTT mini E3 board since it has 32bit and TMC2208 for the same/similar price.
              I know some older batches of the V1.1.4 did comes with TMC2208(quiet stepper motor) but that's a lucky dip.
              The 32bit is an upgrade over the 8bit board as it helps with linear advance and curves when printing. Gives it a smoother lines without blobs on corners and curves. Yes, it's definitely not the silent motor from the batch we received after the test print.

              • @iamtezr: That's conflicting information from what I researched. Everything to this point has been very clear that the silent operation has nothing to do with the stepper motors themselves. The question remains I guess. Why are sellers selling a control board upgrade (no new stepper motor parts) and advertising that this makes silent operation, if your saying the motors themselves need changing? Unless you mean 'stepper motor drivers' (circuitry on the controller board) rather than 'stepper motors'? That would make more sense.

                • @Hazza: That's correct, TMC2208 and HR 4988 are stepper motors 'drivers'.
                  Should have said drivers instead but since we were talking about the board thought that you would know i was referring to the drivers as the 'stepper motor' is a different component itself.

                  So yeah, it's the drivers we're talking about here

                  • +1

                    @iamtezr: Yep figured as much, but expected the term 'stepper drivers' or 'motor drivers' rather than 'stepper motors' so wanted to clarify. All good, thanks for the info.

    • You ordered the Ender 3 Pro from Banggood ? How long ago ?

      • Ordered from this deal (Banggood Au warehouse) a few hours after it was posted.

    • I can also confirm getting a 4.2.2 in a Pro from Banggood, ordered an hour or so after the deal went up.

      • I’d say the loudest thing is the PSU fan when it kicks in. After that the motors and other fans seem quite similar, with the motors being a higher pitched noise than the drone of the fans. Neither that intrusive during the day, but travels a lot more at night in particular the highest pitched elements of the motors.

    • i cancelled my original order of the ender 3 pro standalone + glass bed + PLA because the entire shipment was held back because they were waiting on the glass bed to be restocked.

      just got my refund last night and immediately bought the ender 3xs pro which is basically a modded 3 pro with the v1.1.5 with silent motors, plus it included the glass bed which is supposedly in stock.

      now im finding out you get a 32bit board in the ender 3 pro which is probably more important to me than the silent motors on the 8bit v1.1.5 board. Urgh, can't win on all my 3d printing purchases on banggood thus far!

  • Looking to get a bl touch, but want a genuine as I already have a 3d touch. Is this an original ?
    How do I know if this is sold by creality?

    [AU$56.92 20% OFF]Original BL-Touch Smart Auto Bed Leveling Sensor To be a Premium for Reprap i3 3D Printer Office Equipment from Computers & Office on banggood
    https://banggood.app.link/HiCTyeBVZ8

    • +1

      from the looks of it, it looks like a legit BL Touch but not from creality. It's from banggood since you're buying from them. Creality doesn't make these. Original BL touch is made by ANTCLABS in south korea. Banggood, Creality and other sources are the resellers.

      If you want one for your Creality ender 3/5/10 then why not buy it direct from creality store so you know you're getting a legit version.
      https://www.creality3dofficial.com/collections/bl-touch/prod…
      It's $49USD and I think you get $5 off when signing up so $45USD ($61.35 AUD) and it comes with a longer cable as well as the sensor adapter, mount and other tools to get it up and running on the Ender/CR series.

  • Just got the notification that mine was delivered today. What are the best build video to follow along to build this Ender 3? There are quite a few out there. Any you would recommend over the other?

    • +2

      The instruction booklet that comes with printer should be pretty straight forward as the Ender3/Pro is partially built unlike the older printers like the Anet A8. You shouldn't have any issues if you follow the steps in the manual BUT if you're struggling, the first couple hits on youtube by typing 'Ender 3(/Pro) Build Instructions' should guide you nicely.

  • Well I ordered mine direct from Creality, and I'm still waiting for any kind of shipping update.
    It was meant to be coming from AU and take 3 - 4 days delivery, but it's 10 days later and there's literally nothing in my order about shipping or delivery.

    Very disappointing that I would have the printer if I went with the third party seller.

    • +1

      In the same boat. I emailed them. It sounds like they don’t have stock in the AU warehouse. They shipped out of China. Sent me the tracking via email just then after the third prompt.

      Really poor customer service. Will be buying upgrades elsewhere after this experience

      • Yep, I got an email back earlier:
        "Dear customer,
        We had open a checking case with the supplier, then we will upgrade to you when we receive the news from them.
        [[url to tracking data that says it's in Melbourne and in transit on 10th August]]
        Sorry for the inconvenience."

        Agreed - I'll go with another provider next time.

        • My tracking seems to indicate it's coming from Singapore. 'Best' part is that I called DHL and the printer hasn't even been picked up….

          • +1

            @rw123: I've cancelled my order with Creality direct (literally nothing has happened with the order for almost 3 weeks now) and purchased the V2 from Banggood.
            It's already on it's way and will be here in a week.

            Don't bother buying direct is the lesson I have learned here.

  • +1

    I ordered on 7th and got a tracking number after 3 days but there is still no tracking data available. Tracking it with Auspost says no updates yet. Anyone else on the same boat?

    • +1

      My one jumped from being sterilized in their warehouse to Onboard and then delivered with nothing in between, ordered 7th delivered 13th. Delivered by Aramex.

      • That was quick!, mine just says sterilised and shipped out. Where are you based? I think it comes from Vic and i am in NSW so Covid delays maybe?

        • +1

          Gold Coast.

          • @Pobman: I ordered Friday 14th (night) also for delivery to the Gold Coast.
            Still in Sydney at the moment.. hoping it arrives by Friday.

        • Checking the tracking on Aramex rather than Banggood shows it came from Sydney.

          • +1

            @Pobman: Aramex just delivered by Ender3 Pro to the Gold Coast.. happy with that, less than 1 week and I got it before the weekend.

            Now I just have to put the thing together…. and wait for my 6 spools of PLA+ to arrive.

    • same no updates on auspost since last 12 days. any updates on yours?

      • Nothing yet! I went on Banggood livechat and the customer service rep said that if i don't get it within 20 days then I will get my money back.

  • I am having trouble levelling the bed on my new Ender 3 Pro - the bed springs seem to run out of tension way before the bed is high enough to be paper-thickness from the nozzle in the Home position.
    Any suggestions ?
    Info and photos linked here: https://forums.whirlpool.net.au/thread/9vk04p23?p=192#r3827

    • try adjusting the other sides if one side isn't high enough. had the same issue.

      • I will take another look now, but in my earlier go the only corner that would get anywhere near (within 5mm) of the nozzle was the front left corner - the other 3 were way off - at the point where the adjustment wheels were free-spinning and no longer compressing the springs at all.

        Its like the Z-stop needs to be 5 or 10mm lower… which means removing the tab at the bottom that rests on the bottom metal rail.
        Which I saw in 1 video was occasionally required.

        I believe all 4 springs should be under some compression (approx half way between fully compressed and not compressed).
        If several of the springs are under almost zero compression, the weight of a large print may cause the bed to dip in those "weak" corners ?

        I might fully compress all 4 corners and then measure the distance of each to the nozzle - to get an idea of how far the Z-stop may need to move down (the smallest corner distance - less a couple of mm).

        EDIT: that said, if all 4 corner springs are under quite a bit of compression, does that tend to cause dips in the middle ?

        • OK, with all 4 corner springs fully compressed, it looks like the print nozzle is:
          - 4 - 5mm above the bed in the back-left corner (where the heating cable connects)
          - 6 - 7 mm in each of the other 3 corners

          Interesting that the front-left corner that adjusted well, and still felt like it had some spring compression, is the same distance as other corners that run out of spring compression well before reaching 1mm of the nozzle.
          Its as if I have 1 good spring and 3 useless springs.

          In that back-left corner, I get about 2mm of adjustment from full-spring-compression, to the adjustment wheel free-spinning as the spring is not putting any tension on it.

          It might be fine once the glass print bed arrives - as that should add 4mm or so to the bed height - but I really want to get printing this weekend.

          EDIT:
          Example, pics of rear-left corner with full spring compression, and zero spring compression (adjustment wheel free-spinning)

          https://imgur.com/n3oGINY
          https://imgur.com/MEShZNc

          2 other strange things.

          1) When I select "disable steppers" in the menu, nothing seems to happen. It doesnt say steppers disabled, or change the option to "enable steppers", and when I move the bed it feels the same.

          2) When I move the bed should I feel the same/smooth all the way from front to back ?
          I can feel ~4 "bumps" along the range of travel. Makes me wonder if there is a flat spot on one of the wheels.. although I cannot see/feel anything on the wheels or track.

          • @systmworks: I have snipped off the plastic tab on the Z-axis stopper so I could lower it by 4 - 5mm on the left vertical support.

            Am now able to set all 4 corners to paper-width of the nozzle.
            The printer is now doing its first test print… so far so good.. yay :)

            Woops, reply to myself.. ok..

            • @systmworks: Nice work. Does the manual or help vids say anything about snipping off the Z axis plastic tab?

              • @Hazza: Its not in the assembly instructions (its more pictures than written).

                But its working well… have been printing almost non-stop since last night :)
                Had 1 failed print overnight (I think the filament was coming off the roll incorrectly - not smoothly - never cross the streams !) but the rest have all been OK.

                Ive just started printing the first leg support for my IKEA Lack printer enclosure. 4 hours per leg support.
                https://www.thingiverse.com/thing:3052378

              • +2

                @Hazza: Some prints from my first day (well ~30 hours) of printing. https://imgur.com/a/bQApecA

                Ive just started a 3 piece (7 hour) print and am going to bed.
                Its printing layer 1 for all 3 items now, and I can see a couple of spots where it fingerprints on the surface are affecting bed adhesion, so I need to clean the bed tomorrow with iso.

                • @systmworks: Nice work! Wow the height of that rail, impressive. I would have thought you would have to print something like that lying down.

                  Yeah recommendation is cleaning the bed with iso before every print.

                  • @Hazza: Yeah I would have expected it to print flat too - so either I was supposed to make it lay flat (then why not set the pattern to lay flat !) - or for technical reasons it needs to print that way.

                    The print bed was moving too fast (50mm / second - default) so as it got taller you could see it waving and the print quality suffered. Bottom half was good.

  • Did anyone get this for 290AUD shipped? I'm getting 350AUD including shipping and tax. less 20aud if I sign up with banggood.
    So 330aud?

    • I got the Ender 3 Pro for AU$ 295 delivered in 4 working days.

    • Yeah we all got the Pro for $293 delivered. But it is out of stock from the Aussie warehouse at the moment. Just wait till it comes back in stock and it will be that price again, or lower.

      • I've cancelled 2 x 3d printer orders over the last 4 weeks. I originally got one of the original ender 3 for 260ish waited 2 weeks then cancelled. Then got the biqu b1 for 275ish, but had to wait until Sept 5th and I cancelled that bang on sep 5th when biqu announced the bx. I've reserved a biqu bx for $10 and be on the books to back it on KS for $249 USD. Biqu reckon the mrrp will be $499USD. Hope it's worth the wait.

        • I made sure to order the Ender 3 when it was showing in stock at the Aussie warehouse. This isn't a guarantee but makes it more likely for a quick delivery.

          Did you follow up your orders with the banggood online chat to query the delivery delays? Funnily enough I am having a harder time finding filament I want in stock than the printer lol.

          • @Hazza: What type/colours are you looking for ?
            I ordered 9 spools of filament from 3Dfillies and both orders arrived to QLD within about 3 working days.

            There were a few colours they were out of, but I got black, red, yellow, blue, transparent red, transparent grey, light grey, silver, gold.
            Ive used all the colours so far except blue.
            I think Copper, and maybe Marble were the only colours I wanted but they were out of stock.

            • @systmworks: I have been checking back every 2-3 days for a month, for black PLA+ and ABS. Its always shown out of stock like it does now?

              • @Hazza: Oh.. hmmm maybe I got lucky 2-3 weeks ago when I ordered my first 6 spools - black was in stock and arrived.
                Yeah there are much more out of stock now than a couple of weeks ago.

                • @systmworks: Yeah I have been looking every few days since I bought the printer. I might have missed the last time they restocked by not checking every day. Surely they will have a restock any day now.

  • +1

    FYI for those who have received Ender 3 / Ender 3 Pro printers with the new v4.x 32-bit boards, there is a new video that makes it pretty easy to compile and install the latest Marlin 2.0 firmware (the official Ender firmware is based on Marlin 1.0 for most models).
    https://www.youtube.com/watch?v=neS7lB7fCww

    I followed it yesterday afternoon, and it only took a few minutes to create/install.
    https://imgur.com/8KFw2HD

    • install the free Visual Studio Code (VScode) app from Microsoft
    • install the PlatformIO extension within the app
    • download 2 ZIP files from the Marlin github
    • copy the correct Ender 3 config files to the Marlin folder
    • make a few small changes (actually most are just checking rather than changing) to 3 text files
    • hit the compile button
    • copy BIN file to blank SD card and boot up the Ender
    • I see near the end of that video (20:50) he shows a plug and play upgrade of the stepper driver chip from A4988 to TMC2208. So if we have 4.2.2 boards, does this mean we can just buy the TMC2208/TMC2205 driver chip and replace the A4988 to make silent operation like in this video? Someone else mentioned the driver chip was soldered on. I will try open mine up and have a look when I finish printing.

      • Not sure sorry.
        While you have it open take note/picture of the main chip (it's not covered by heatsink) as the model can vary slightly (by 1 letter) and is specified in the code.

Login or Join to leave a comment